- Split your chord voicing across layers. One handles the weight, one handles the color. No more stacking full chords on every pad.
- Give each layer its own envelope. Let them push and pull against each other so the chord feels like it’s moving.
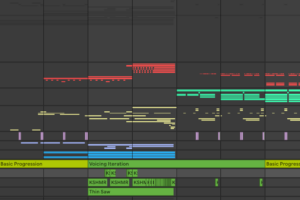
- Process by role, not by group. Use KSHMR Essentials and KSHMR Reverb to control tone and space without smearing everything together.
- Change voicing over time. Invert one chord. Drop a note. Add a 9th. That’s how a four-bar loop becomes a full section.
- Fill the sub with intention. Let your pad handle low-end weight during breakdowns when kick and bass drop—keeps the track grounded without adding new parts.
It’s easy to assume that all pads are good for is providing background glue and harmonic support for your track’s more important elements, and a lot of the time, well, that’s exactly how they’re used. But when you build, sound design and layer them with intention.
Each section of this article is designed to build on the last to offer a usable workflow that can turn even basic synth patches into stacks with layered nuance, but even just applying two or three of these approaches in sequence is enough to tap into a lot more depth in your pads while avoiding extra clutter.
With a bit of motion, contrast, and a little more attention to detail than you get with just holding down chords, they can carry a surprising amount of weight in a track and even be a leading element in their own right.
So let’s debunk and unpack…
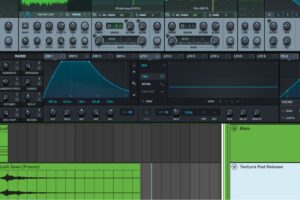
Blend Pad Layers with Non-Pad Sources
The base layer defines the sound, and the other layers will act as supports.
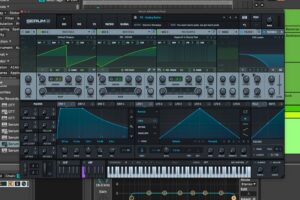
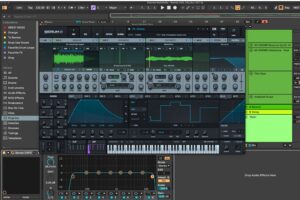
Even presets out of a powerhouse VST like Serum 2 will only get you so far, and with a bit of clever and intentional layering, you can get those expressive and “expensive-sounding” chord stacks completely in the box.
Of course, you want a strong base layer of your pad stack, of which our latest SYMPHONY 2 delivers in spades. Because from there, you can dial in your envelopes, modulation curves, and basically any parameter down to the near molecular level (it’s why Serum 2 is our go-to synth for almost anything). That level of precision is a game-changer, but on its own, it can make the progression feel too polished and predictable.
That’s where contrast matters, both in how the sound changes over time (which we chat about in the next section) and the overall timbre of the sounds comprising the stack.
Instead of adding another synth saw-based pad on top, try pairing Serum 2 patch with something organic: an expressive acoustic string bed, a bowed instrument, or even a loosely played vocal phrase. Even if both patches come from the same synth like Serum 2, the contrasting timbre-based intentionality behind the sound selection is important and why tools like our Serum Hybrid Orchestra are invaluable.
The sample-based supporting layer adds nuance and detail.
Sampler and rompler-based strings, though, offer an interesting element to the mix as they often don’t respond the same way each time. The imperfections in how they move over time—their attack, phrasing, and unpredictable dynamics—can breathe life into an otherwise tightly controlled stack.
You can get the best of both worlds by layering an acoustic string layer underneath a tighter, controlled VST-based layer.
The synth, with its atomical levels of precision, gives you control; the organic layer gives you movement. Together, they create a push-pull that feels more human and more emotional than either source could deliver on its own.
Serum 2’s X-factor is how you can dial in parameters down to the millisecond.
Don’t worry about the organic layer sitting perfectly on beat or on the grid. That friction is part of what makes the combination work.
Kicks and bass rarely occupy the lefts and rights. Try filling that space with the warmth of your pads!
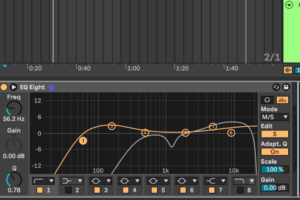
Pro tip: Warmth lives in the low mids—but don’t kill it with a broad, blanket EQ cut. Switch to mid/side EQ. Roll off the center or your strings and pads to leave space for the kick and bass, then ease off the sides so that warmth stays alive in the edges. That subtle low-mid presence pads and string layers add to the stereo field, making the whole mix feel fuller and warmer.
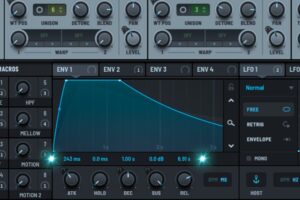
Use Contrasting Envelopes to Create Inner Movement
Always look to pair envelopes that push and pull against each other.
One pad swells slowly to create tension. The other hits faster to give the chord an edge. When timed right, they interact with each other more than they blend, making all the difference. It mirrors orchestral or choral movement, even if you’re playing the exact same MIDI file.
Notice how the amp envelopes work with, not against, each other?
Where most producers get it wrong is by stacking too many similar pads, thinking it’ll sound bigger. It doesn’t. We hinted at that in the above section, but now let’s get into the weeds a bit more.
After all, two things occupying the same space in frequency and time are the textbook definition of “mud.” One pad should lead the timbre of the chord stack. One should trail and support. One might sit in the high mid, the other carries the low body. That tension between them is what makes the collective chord unit feel alive.
Pay attention to decay and release here, too.
If everything sustains over the same time, your layers will blur. Design them so one pad pulls back as the other peaks. That’s where you start getting phrasing instead of just layering. When the differences are intentional, the pad stack feels clearer, wider, and more expressive than any sound could deliver.
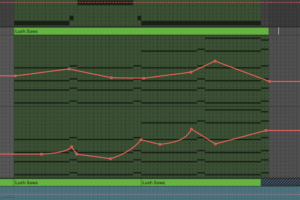
Look how the audio of the release layer moves over time and compare that….
…to how the main body layer moves over time; thanks to its ADSRs.
This isn’t unique only to pads either, as this layering strategy can be used on almost any sound in a mix to great effect. We wrote a guide on layering leads like this, which you can read here. Pads are just more fun, as their held nature means you can do more interesting things with them over time.
Pro tip: Don’t just think about timbre when layering pads; assign each layer a specific role. One might carry the harmonic weight, another adds shimmer in the upper register, and a third provides subtle movement or texture. This approach guides your EQ and processing decisions and ensures each layer, or even a whole synth group you’re processing, complements the others, resulting in a cohesive and expressive soundscape.
Label your layers by timbre and role it plays in the synth stack.
Split Harmonic Roles Across Layers
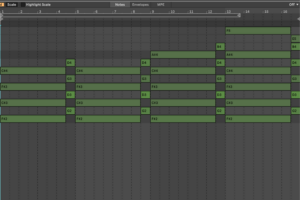
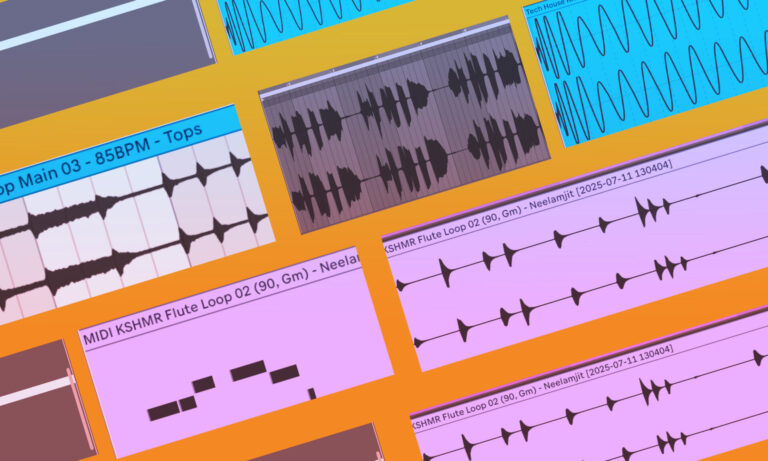
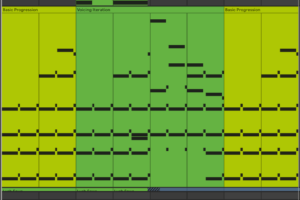
Here is the basic chord progression we will be iterating on.
Breaking up your pad voicing lets you process each range on its own terms. If one layer covers the root and fifth, it stays dry and centered. If another is handling color tones—9ths, 11ths, 13ths—you’ve got room to push it harder.
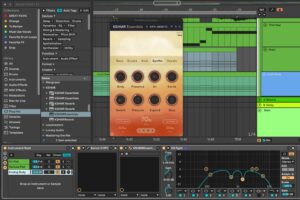
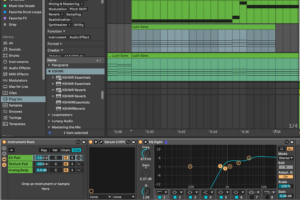
KSHMR Essentials allows for broadband application of nuance and detail.
KSHMR Essentials offers Swiss-Army-knife levels of functionality for this exact purpose (or at for this purpose is one of the many things this plugin can do in the right hands). On the midrange pad, use the Synths bank to shape tone and presence.
Dial in Pressure and Glue for control, then push a bit of saturation with the Tape module to give the chord some weight without bloating it. It’s a quick way to get a definition without flattening the dynamics.
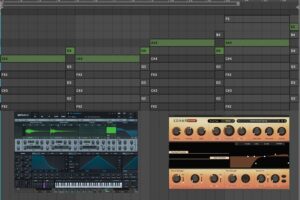
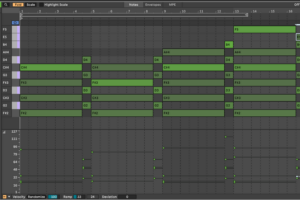
Try splitting each layer onto its own channel and have different layers play different voices!
For the higher pad layer, KSHMR Reverb 1.2 can make the top end feel like it’s floating without washing out the rest of the mix. Try using the Octave function to thicken the reverb tail slightly, then tame it with Auto-Ducking so the reverb backs off when new notes hit. Tonal Reset is useful here too—especially when the voicings shift. It keeps the decay clean between changes and stops harmonic smearing from creeping in.
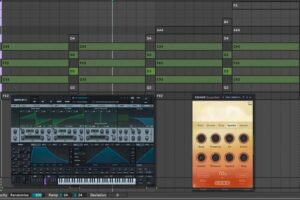
Since the main layer only plays the mid-range notes, we can drive its warmth a bit harder with KSHMR Essentials.
Use one plugin to control the body, and the other to shape the space around it. Each layer gets its role, its treatment, and its automation. That separation keeps things clear even when the progression is dense.
Pro tip: Once you’ve shaped each pad, run the stack through a soft compressor or OTT at 10–20% mix. It’ll glue the layers together and pull any creative uses of reverb, saturation, and movement into a single shape. Even heavy compression works here—it flattens the excess and locks the patch into place without killing the feel.
Automate Filter and Modulation Per Layer
Once your chord layers and FX are locked and the pads sound tight over a short loop, the next step is figuring out how they move across the full arrangement.
Each pad should carry its own motion.
Micro expressions and automations, paired with longer 8/16 bar automation, ensure that no two bars of your music are ever truly the “same.”
One might open a low-pass filter across eight bars. Another might slowly ride an LFO on amp level or reverb depth. A third might push into saturation right before transitions. It’s easy to think that the professional producers you look up to are modulating 10+ parameters over time to create their pads, but that’s not always true. More often than not, just a few expressive and meaningful automation points can build the tension and movement you need to carry the track between sections.
You don’t need every layer to move, but you do need each one to move differently.
As the various layers move with and against each other, it creates an overall sense of movement that is anything but predicatable and digital (…which is the secret sauce for convincing your listeners that they aren’t listening to something made entirely in the box and on a laptop even though, 90% of the time, that’s exactly what they’re doing!).
Save the dramatic moves—big filter sweeps, macro FX, full wet/dry reverb throws—for breakdowns or sparse transitions. That’s when the listener has space to track those changes. If you throw everything at a busy section, it muddles the groove and makes it harder to follow.
A lot of detail can be injected into a MIDI clip by just adjusting the velocity of a few choice notes.
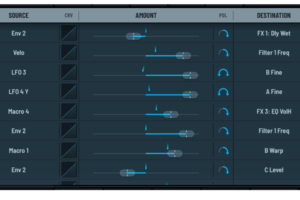
Especially once you assign that “Velo” parameter to something that really makes the synth come alive.
Pro tip: Use MIDI velocity as a mod source. It’s an easy way to humanize filter or volume changes without automation lanes. Layer it with broader modulation moves, and you get detailed control that adds real nuance without overcomplicating the workflow.
Change Voicing Across Phrases
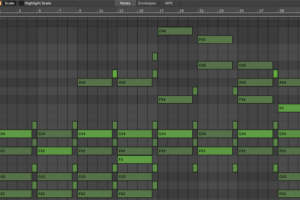
It’s technically the same progression, but the voicings add more emotional storytelling on the loop’s second cycle.
You can get more mileage out of a basic 4-bar progression without changing the chord progression by simply reshaping how the chords are voiced each time the loop cycles over. Shift an inversion, add or remove a note in the second half of a phrase, and you’ll give the loop shape without writing new harmony.
As the arrangement builds, try layering in higher tones like 9ths or 13ths to lift the energy.
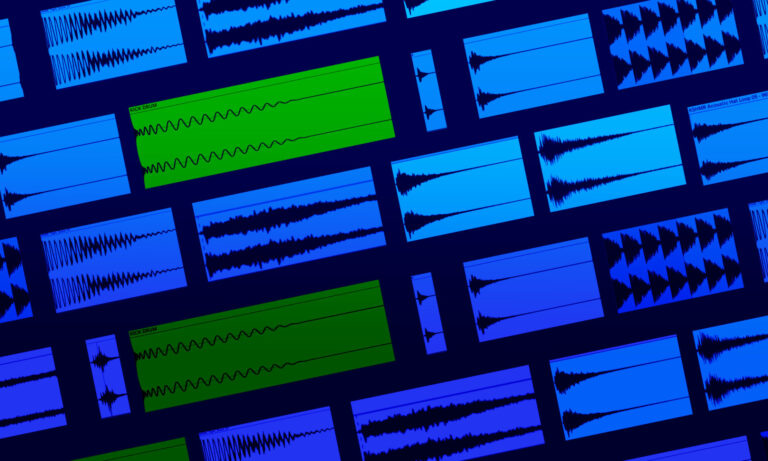
Color-coding the iterations on your various loops can help keep things organized at a glance.
It keeps the harmonic foundation consistent while pushing the progression forward. In sparse sections, do the opposite—drop the upper tones and reinforce the root and fifth in a lower register. That gives the pads more low-end weight when the kick and bass drop out, letting them fill the gap and carry the track’s emotional pressure without overcrowding the mix.
These small voicing moves let you adjust how dense or open the pads feel at any point in the arrangement. Use them to build tension, release it, or give a section its own weight without stacking more instruments.
And can help you know what is playing when from a bird’s eye perspective.
Pro tip: Avoid copy-pasting voicings across 16 bars. Duplicate the MIDI, then change something small—voicing, octave, timing. It’s a five-second move that adds real phrasing. Change the clip color whenever you tweak a voicing. It’s an easy way to spot how variations are spaced across the arrangement at a glance.
Final Thoughts + Creative Challenge
You don’t need complex theory to get great results. You need clean source sounds, well-defined roles, and smart processing.
Start with a few strong pad presets—Sounds of KSHMR Vol. 4 has plenty.
Shape each layer with intention using KSHMR Essentials, especially when separating body from color. Then place everything in space with KSHMR Reverb, using tools like Octave, ducking, or Tonal Reset to keep the mix clean.